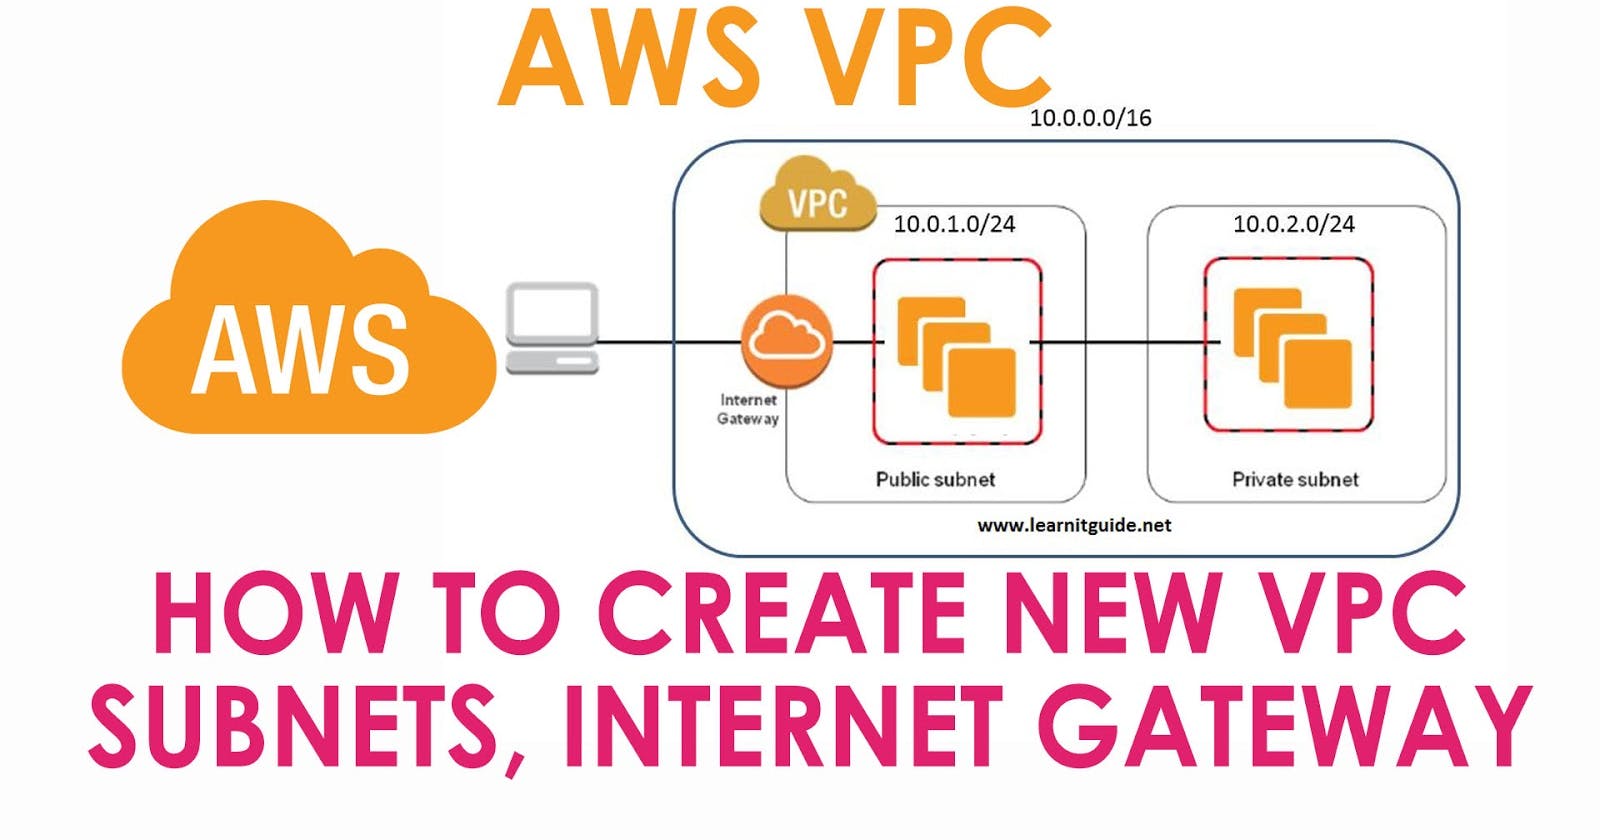
Title: Creating a VPC Instance in AWS: A Step-by-Step Guide
Introduction: In today's cloud computing landscape, Amazon Web Services (AWS) has emerged as a leading provider, offering a wide range of services to meet diverse business needs. One of the foundational components of AWS is the Virtual Private Cloud (VPC), which allows you to create a private network within the AWS cloud. In this blog post, we will guide you through the process of creating a VPC instance in AWS, empowering you to leverage the flexibility and scalability of the cloud while maintaining a secure environment.
Step 1: Sign in to the AWS Management Console To begin, sign in to the AWS Management Console using your AWS account credentials. If you don't have an AWS account, you can easily create one by following the instructions on the AWS website.
Step 2: Navigate to the VPC Dashboard Once you're logged in, navigate to the VPC Dashboard by selecting "Services" from the top menu bar, searching for "VPC," and clicking on "Virtual Private Cloud."
Step 3: Create a New VPC On the VPC Dashboard, click on "Your VPCs" in the left-hand navigation pane. Next, click on the "Create VPC" button to start the VPC creation process. Provide a meaningful name for your VPC and specify the IPv4 CIDR block that will define the IP address range for your VPC.
Step 4: Configure Subnets After creating the VPC, it's time to configure subnets within the VPC. Subnets are logical subdivisions of the IP address range defined by your VPC. Click on "Subnets" in the left-hand navigation pane and then click on the "Create subnet" button. Specify a name for the subnet, select the VPC you created in the previous step, and provide an IPv4 CIDR block for the subnet.
Step 5: Create an Internet Gateway To enable communication between your VPC and the internet, you need to create an Internet Gateway. From the VPC Dashboard, click on "Internet Gateways" in the left-hand navigation pane and then click on the "Create internet gateway" button. Provide a name for the gateway and click on "Create" to complete the process.
Step 6: Attach the Internet Gateway to Your VPC After creating the Internet Gateway, you must attach it to your VPC. Select the newly created Internet Gateway and click on "Actions," followed by "Attach to VPC." Choose the VPC you created earlier and click on "Attach."
Step 7: Create a Route Table A route table defines how traffic is directed within your VPC and between your VPC and the internet. From the VPC Dashboard, click on "Route Tables" in the left-hand navigation pane, and then click on the "Create route table" button. Give the route table a name and select the VPC you created. Click on "Create" to proceed.
Step 8: Configure Route Table Routes With the route table created, it's time to configure the routes. Select the newly created route table and click on the "Routes" tab. Click on "Edit routes," and then click on "Add route" to add a new route. Specify the destination as "0.0.0.0/0" (to represent all internet traffic) and choose the Internet Gateway you attached to your VPC. Click on "Save routes" to finalize the configuration.
Step 9: Associate Subnets with the Route Table To ensure that your subnets can communicate with the internet, you need to associate them with the route table. Select the subnet you created earlier, click on the "Subnet actions" button, and choose "
Screenshots:


Now create an instance:


Now connect the instance:


Get Connected:
If you have any suggestion about this post feel free to let me know and be updated on my blog in the following ways:
#TrainWithShubham #DevOps #chatgpt #AI #devops #devopsengineer #devops2023 #devopscommunity #devopslife #devopsnotes #DevOpsGuys #DevOpsHandbook #devopsinuk #shellscript #linux #AWS #VPC
